


Accessing Pipelines
Navigate to Tasks in the sidebar to see all your pipelines. Each pipeline tracks the progress of a test case import from upload to completion.Creating a Pipeline
1
Upload File
Click Import Test Cases and upload an Excel (.xlsx) or CSV file containing test cases. The pipeline will analyze the file structure automatically.
2
Field Mapping (Gate 1)
The AI analyzes your spreadsheet columns and suggests mappings to OneTest fields (Title, Description, Priority, Steps, etc.). Review and adjust the mappings as needed, then click Confirm to proceed.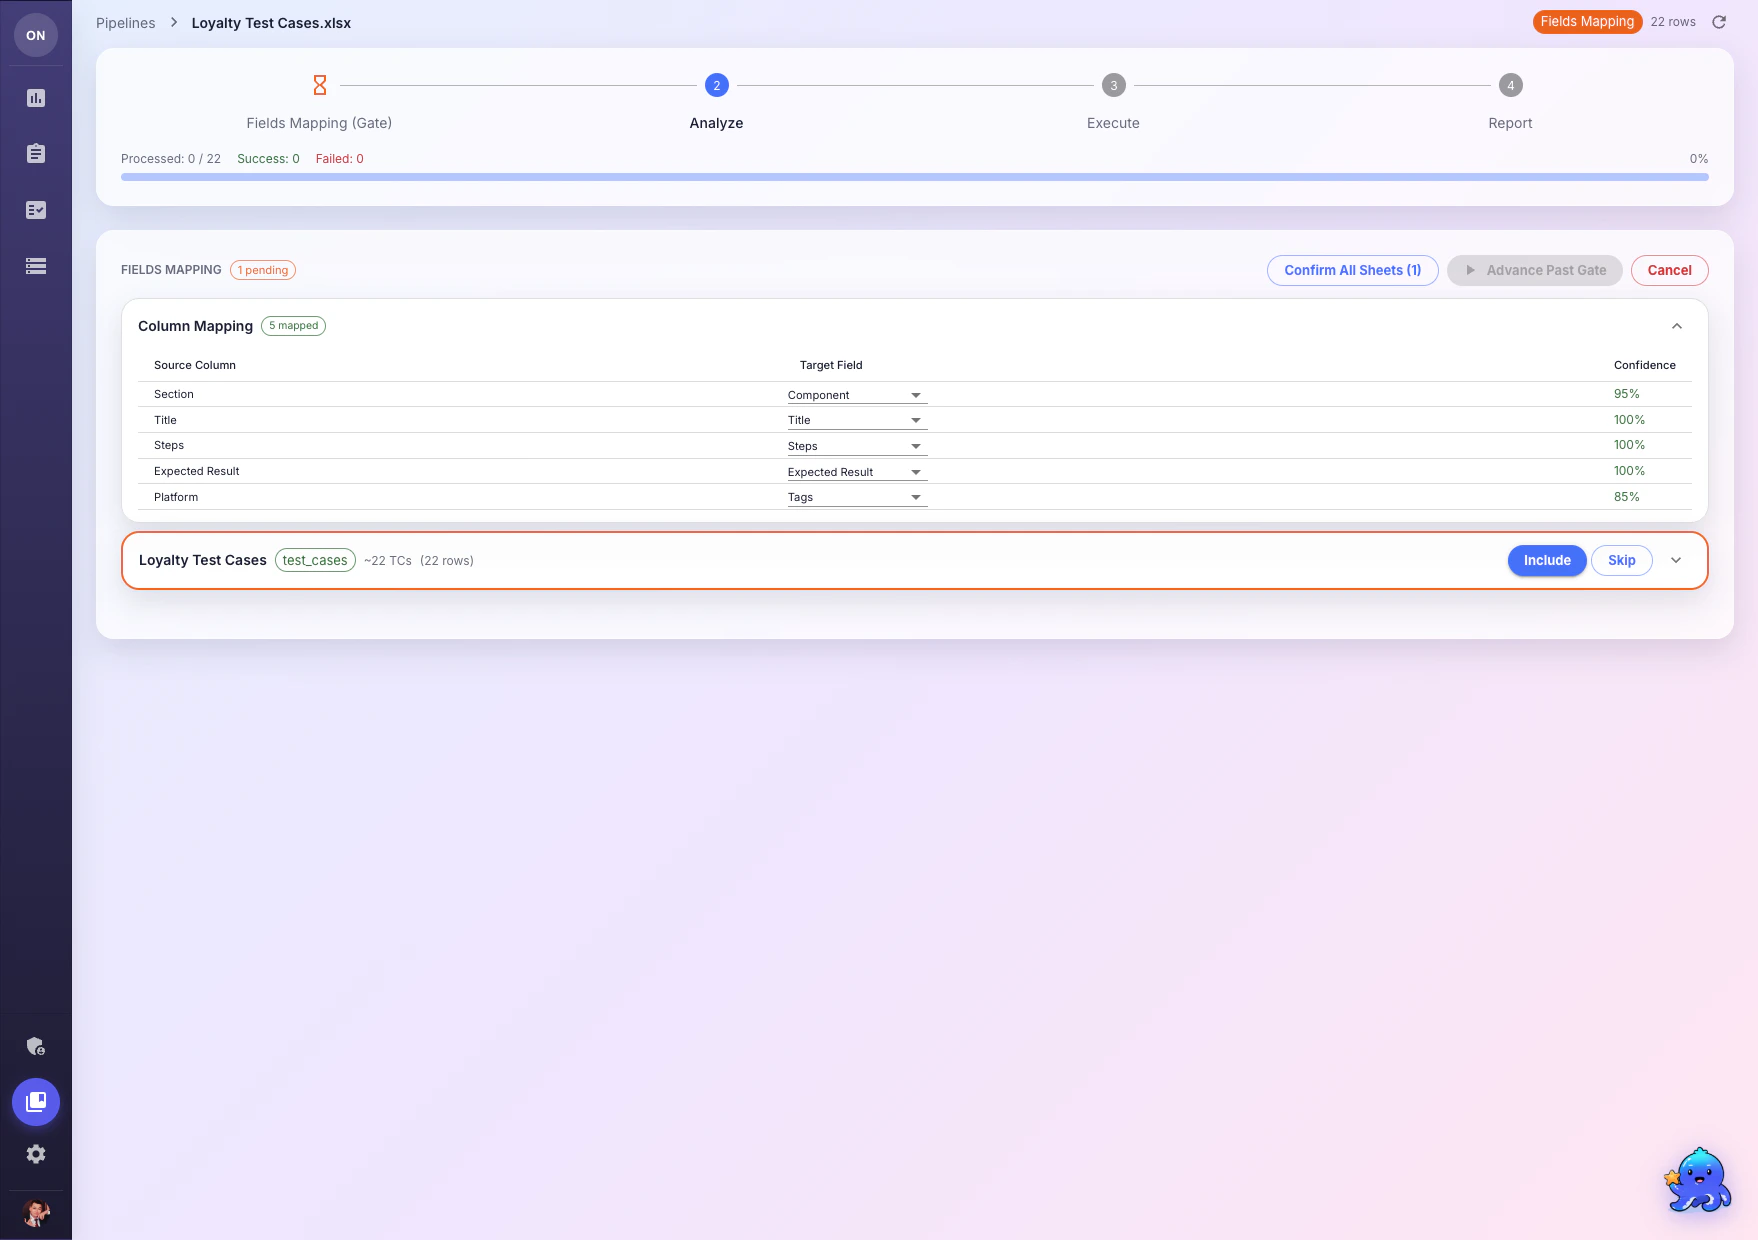
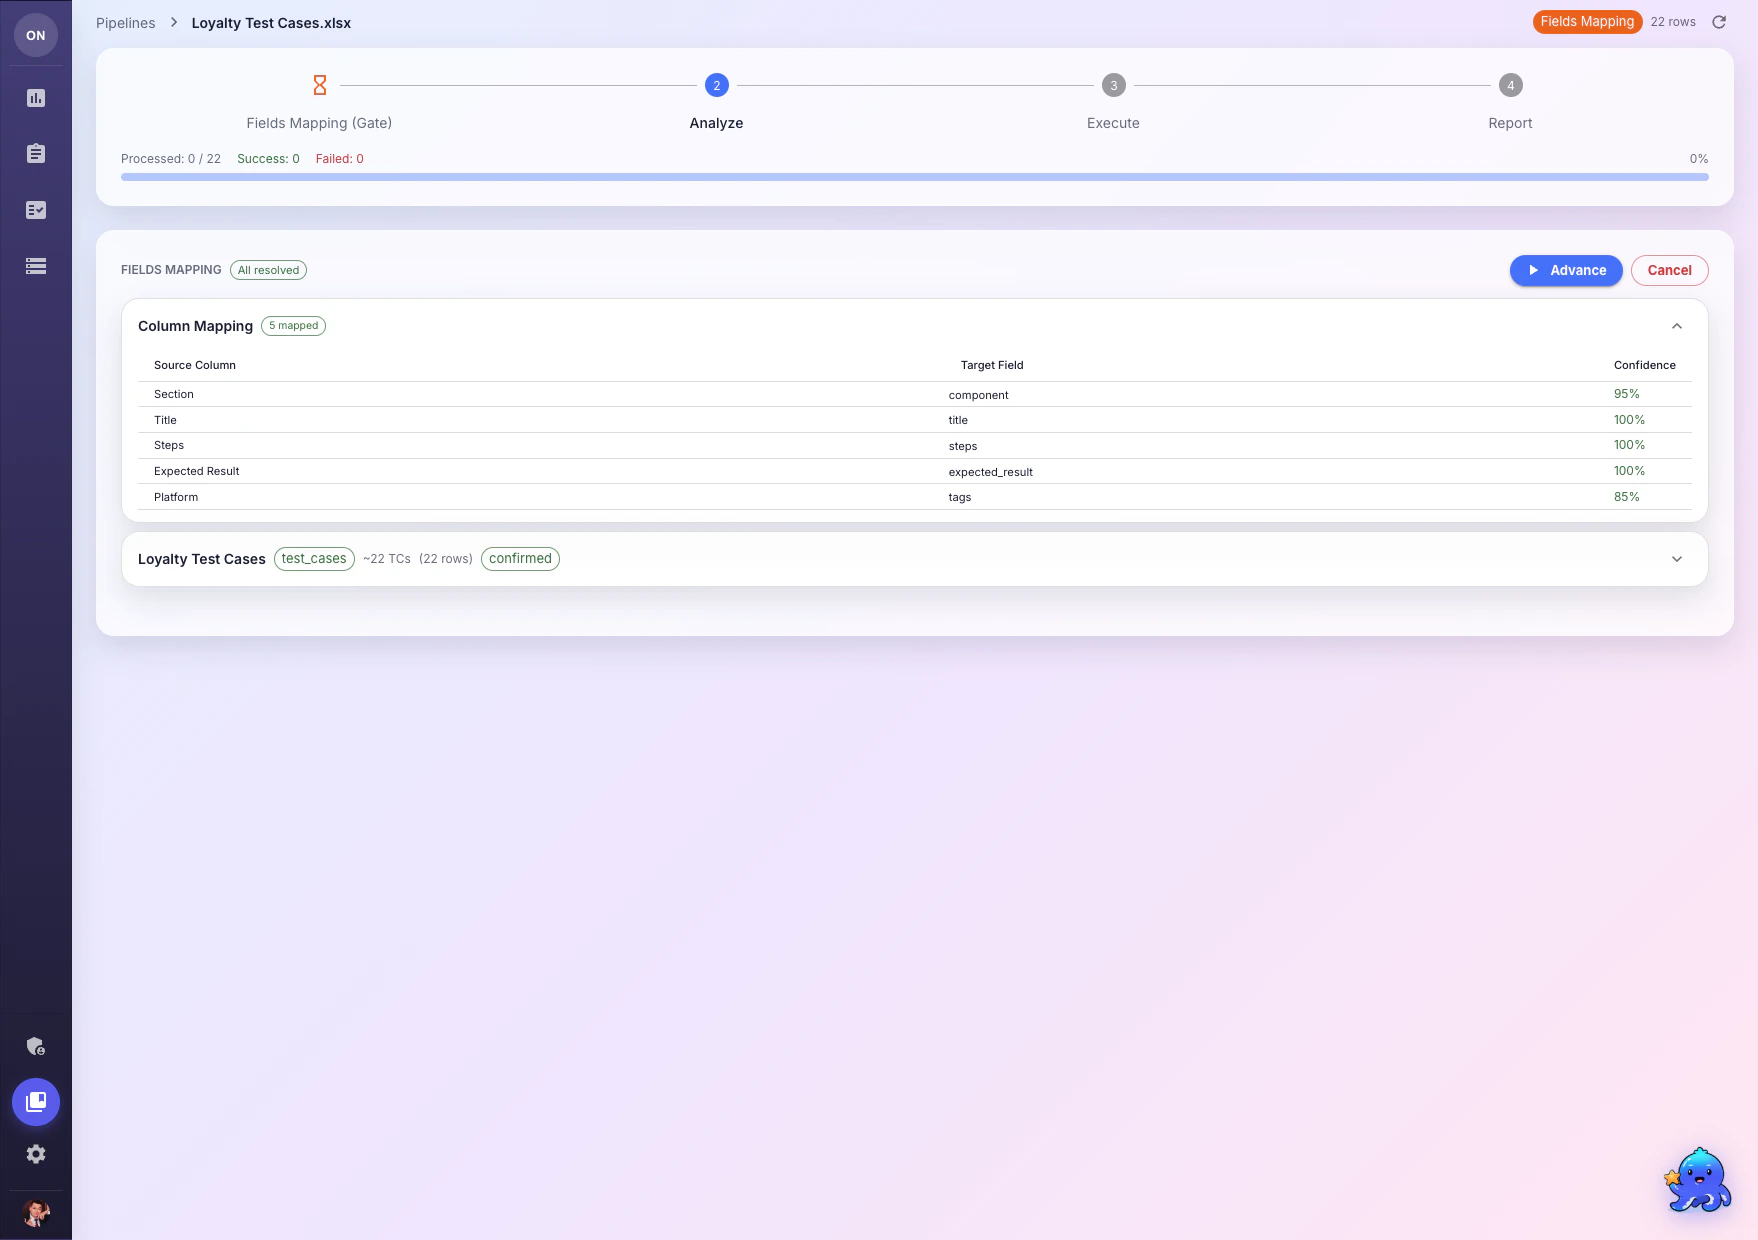
3
Analysis (Gate 2)
The pipeline parses and validates your test cases based on the field mapping. Review any warnings or issues before proceeding.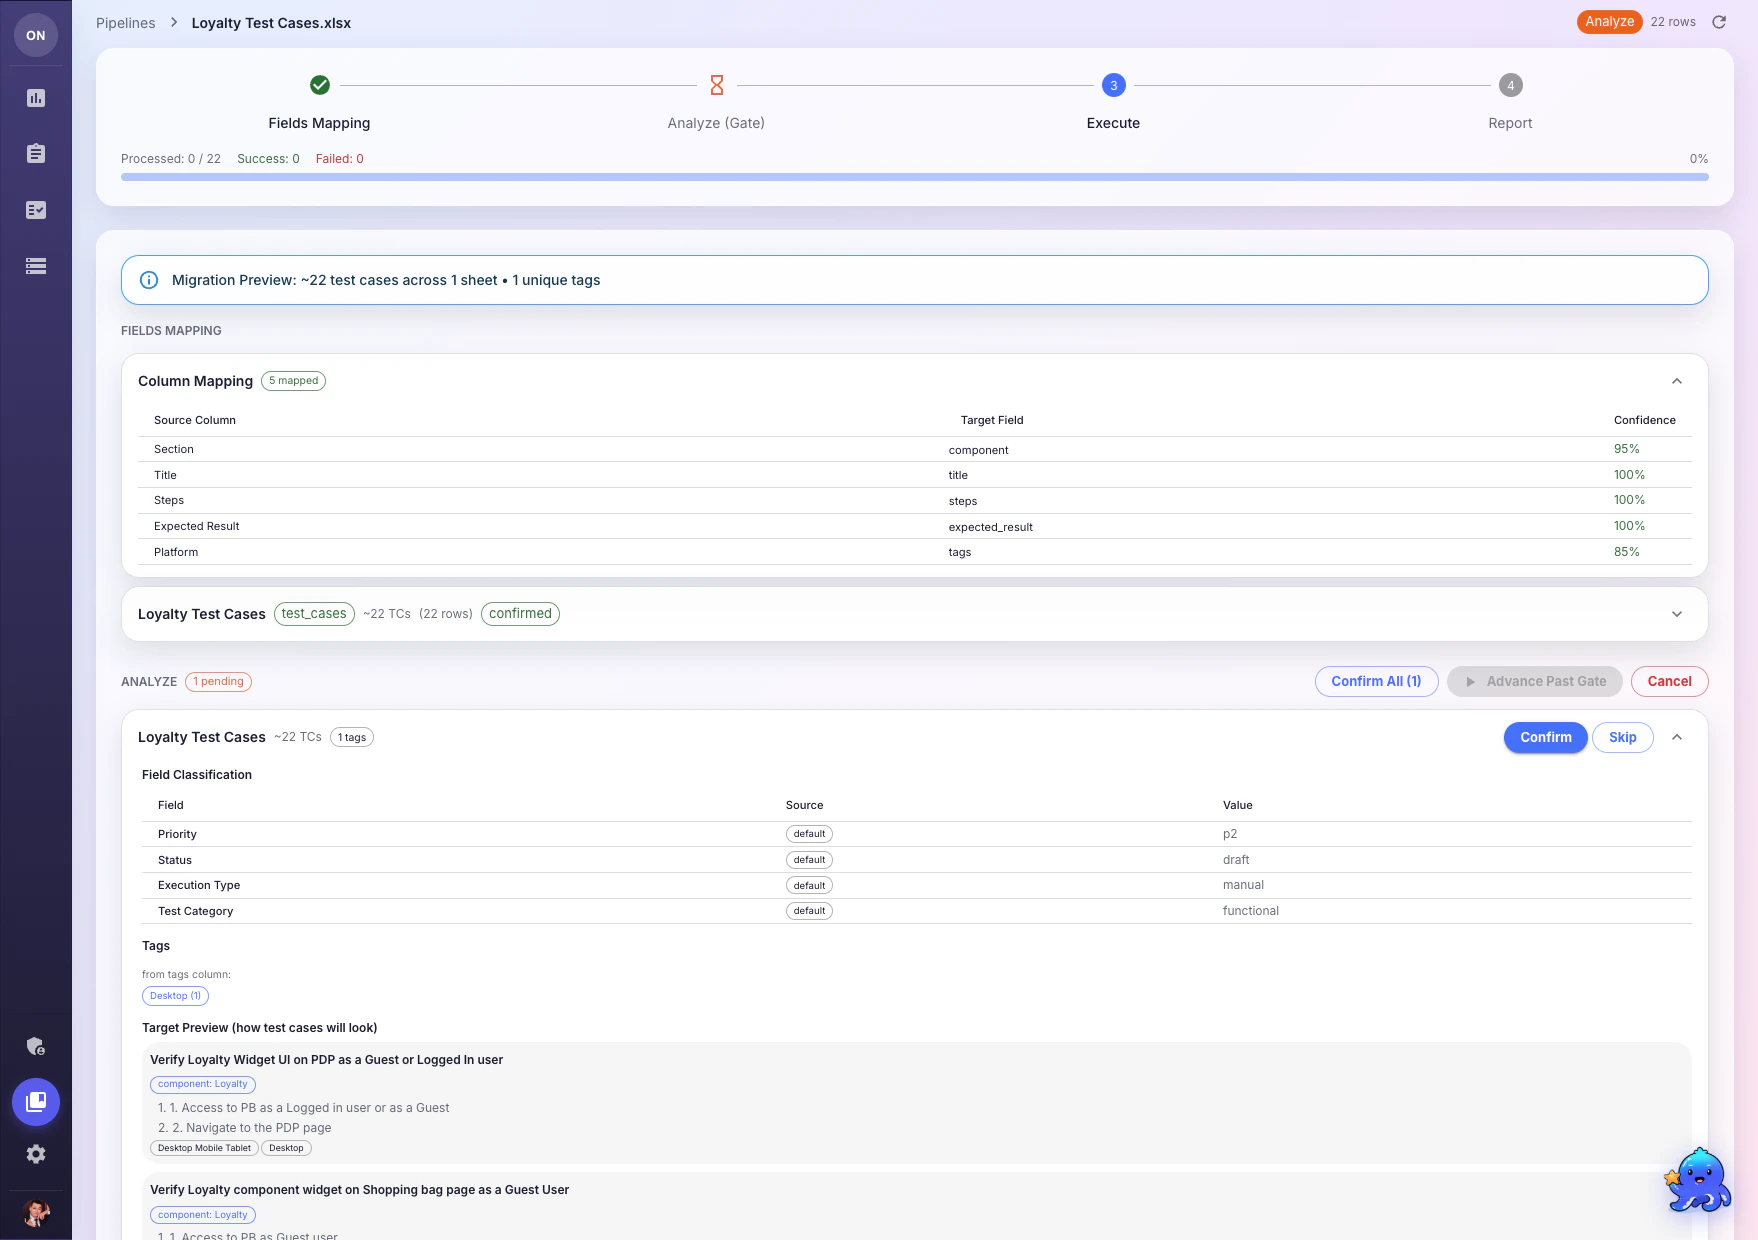
4
Execution & Review (Gate 3)
Test cases are created in OneTest. The pipeline then presents Review Results — AI-detected quality findings such as: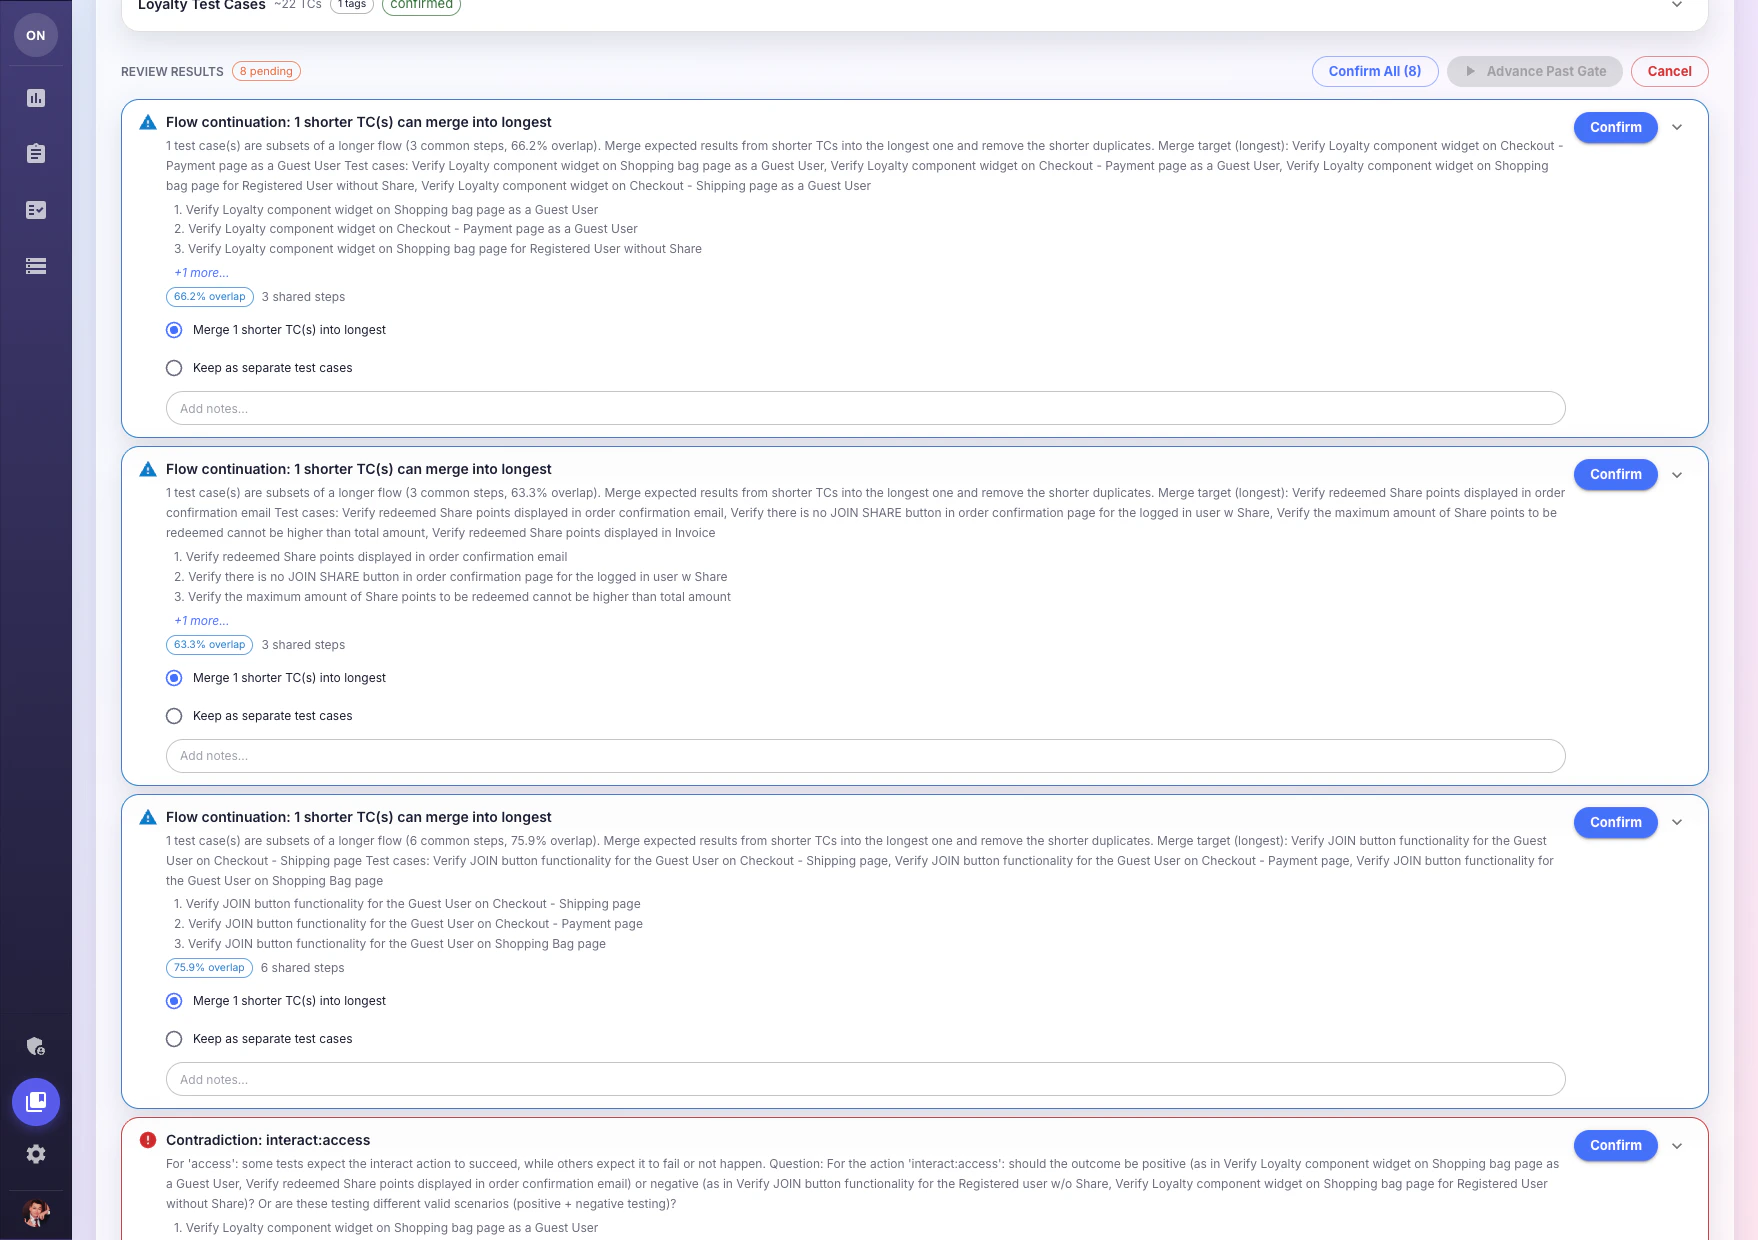
- Flow continuations — shorter test cases that overlap with longer ones and can be merged
- Contradictions — tests with conflicting expected outcomes for the same action
- Merge proposals — duplicate or redundant tests that should be combined
5
Health Report
A comprehensive Health Report compares source file quality against the migrated result: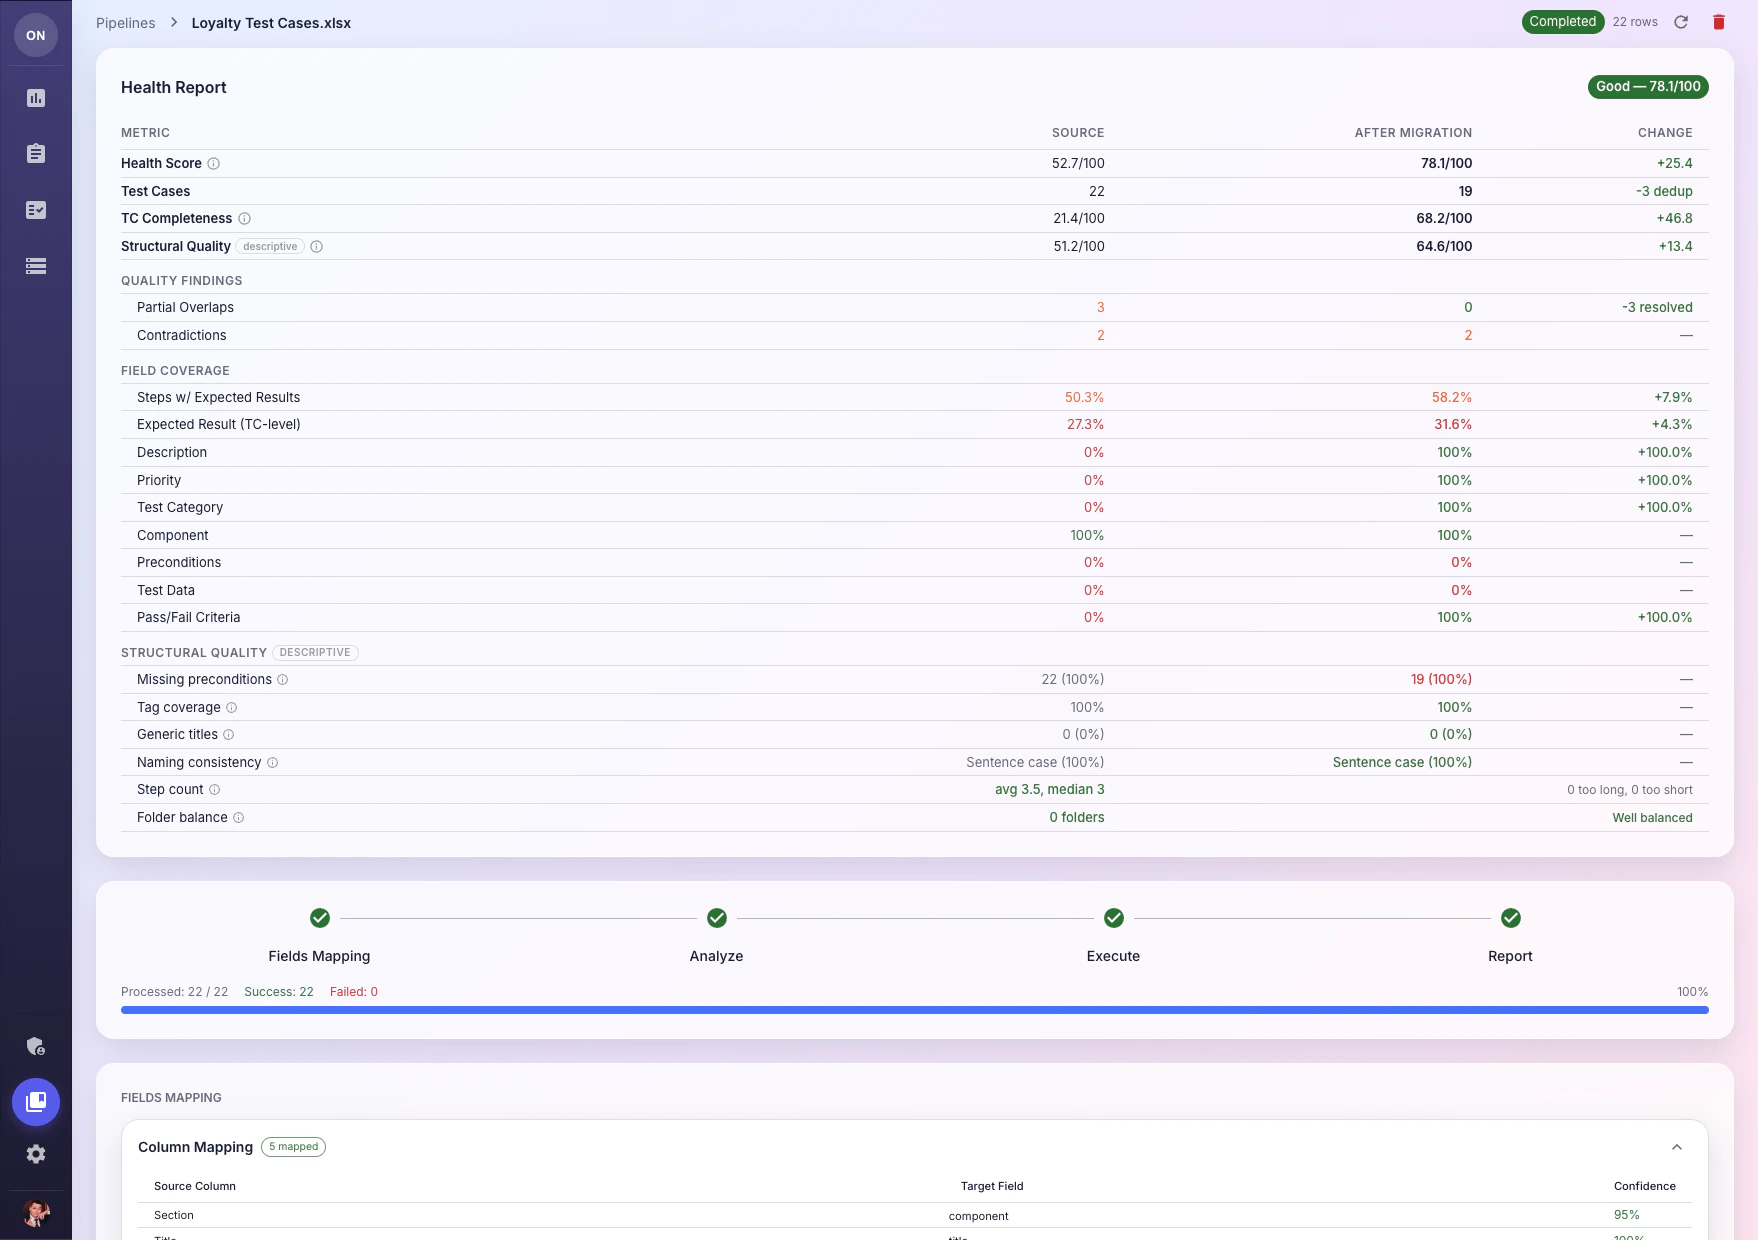
- Health Score — overall quality rating (e.g., 78.1/100)
- TC Completeness — field coverage improvements (description, priority, pass/fail criteria)
- Structural Quality — naming consistency, step counts, tag coverage
- Quality Findings — resolved overlaps and contradictions
6
Completed
Your test cases are now available in Test Cases. Navigate there to review and organize them.
Pipeline Phases
Each pipeline progresses through these phases:Decision Gates
At each gate, the pipeline may present decision items that require your input:- Blocking items — Must be resolved before the pipeline can advance
- Non-blocking items — Can be resolved or skipped
Pipeline Actions
When to Use Pipelines vs Simple Import
What’s Next?
Import & Export
Quick import for standard format files
Test Management
Manage your imported test cases